Using WinSCP with InfiniCLOUD
What is WinSCP
WinSCP is a popular SFTP and FTP application for Windows that supports FTP, FTPS, SFTP, SCP, and S3 file transfer protocols, as well as WebDAV client software for copying files between a local computer and remote servers.
Download WinSCP here
* To turn on or off connections to InfiniCLOUD from applications, it is required to configure from My Page. More details can be found here.
Disclaimer
- Although WinSCP and InfiniCLOUD are connected and users can download/upload files, the application's entire functionality cannot be guaranteed.
- Be sure to save a copy of your InfiniCLOUD data in a separate location before trying this application.
- If your Apps Password is reissued, it is necessary to reconfigure the password for the connected account.
- Please direct all inquiries regarding the application to its vendor.
- InfiniCLOUD does not impose any restrictions on data uploads, but depending on your environment, you may be unable to upload large files.
Connect to InfiniCLOUD
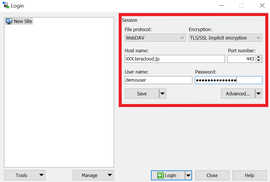
| File Protocol | WebDAV |
|---|---|
| Encryption | TLS/SSL Implicit encryption |
| Host name | Enter your WebDAV Connection URL but only the domain part (ex. https://sample.teracloud.jp/dav/). * While Apps Connection is turned on, your WebDAV Connection URL can be confirmed from My Page. Reference: How do I access and view My Page (account information confirmation page)? |
| Port number | 443 |
| User name | Enter your Connection ID. User IDs and Passwords are case sensitive |
| Password | Enter your Apps Password. * If you forget your password, please reissue using these steps. |
Notes
It may take several minutes for external programs to accept newly reissued app credentials. If an error notice appears shortly after reissuing your password, please wait a few minutes before attempting to reconnect.
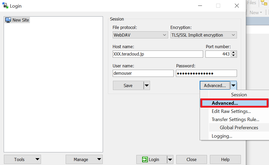
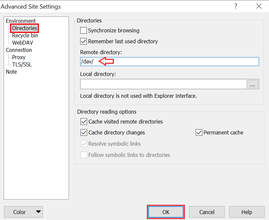
- Click Directories and check that /dav/ is written in the Remote Directory; if it isn't, write "/dav/".
- Click OK
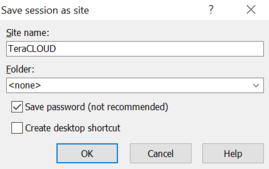
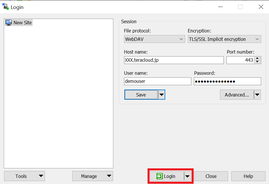
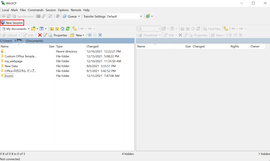
- The local directory will be displayed on the left side.
- InfiniCLOUD's directory will be displayed on the right side.
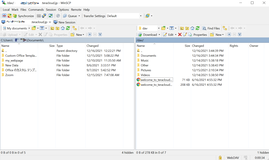
Uploading data
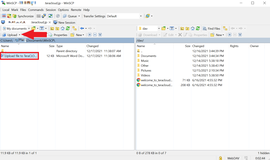
- Select the file/folder you want to upload from the local directory to InfiniCLOUD.
- Click upload or drag & drop it to the right side.
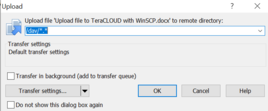
- An upload setting dialog will be displayed.
- Confirm the setting and click OK
- Drag & drop will only prompt the user to confirm the settings one time.
Upload progress will be displayed.
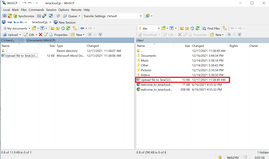
- The uploaded file/folder will now appear in your InfiniCLOUD directory.
Downloading data
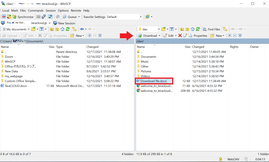
- Select the file/folder you want to download to the local directory.
- Click Download
- Drag & drop is also possible.
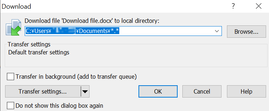
- A download setting dialog will be displayed.
- Confirm the setting and click OK
- Drag & drop will not display not prompt users to confirm the setting.
Download progress will be displayed.
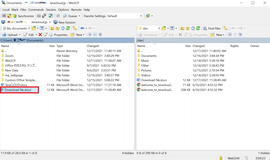
The screen display may differ depending on the version.
Updated June 2, 2021